Engagement Split, a way to monitor dynamic links in Journey Builder
Engagement Split activity allows sending contacts into different paths of your Journey based on whether they opened or clicked a link in an email. What is the problem than?
Clicks tracking in Engagement Splits only works with static links. This means that links containing personalization strings or AMPScript are not supported.
This is a problem that comes back on a lot of projects because of the need for personalized links. And I have seen a lot of people asking for solutions. There is also an idea on ideaexchange that was created back in 2018 to enable dynamic links monitoring, and it has been voted up more than 550 times.
So without further talking, let me show you a way to resolve this issue.
Alias attribute in <a> tag
The alias is an attribute of <a> tag. It specifies the name you want to give to a specific link. It becomes more important when a single URL is used multiple times inside an email and tracking is needed for each specific link.
Alias represents a field we have on Clicks data view and that we will be using in a query. I’ll get into details very soon.
Depending on your use cases, you either need to have the same alias for all dynamic links on your email or a unique alias per link.
Configure the email
Let’s imagine we have a journey with one email that contains a dynamic link on a CTA button to push the Subscriberkey to an external landing page. We will need to come up with a unique name and add it to the alias attribute’s value on the <a> tag as below:
<a href="https://yourlink.com?subid=%%_subscriberkey%%" alias="cmp1_email1_cta1">
That’s all that we need to do on the email.
I recommended using one unique alias per campaign and per email to avoid adding more complexity to the filters on our Journey.
Query Clicks data view
Alright, now that we have the alias set up on the email, we need to get tracking data, put it in a data extension and link it in Data Designer to be able to use it in Journey Builder’s filters.
Create a data extension:
| Field Name | Field Type | Length |
|---|---|---|
| Subscriberkey | Text | 18 |
| LinkName | Text | 1024 |
| EventDate | Date |
Next, we need to link it to our data model in Data Designer using the SubscriberKey.
Next, we need to create a query to get data from Clicks data view and populate our data extension, put the query in an automation and schedule it.
The schedule should consider the wait time activity before the Engagement Split on the journey.
The query is pretty simple, we can use something like:
SELECT SubscriberKey, LinkName, EventDate FROM _Click
This is a very basic example. The query can be optimized in several ways: adding a join with the entry source data extension, adding a where condition on EventDate,…
Journey Builder configuration
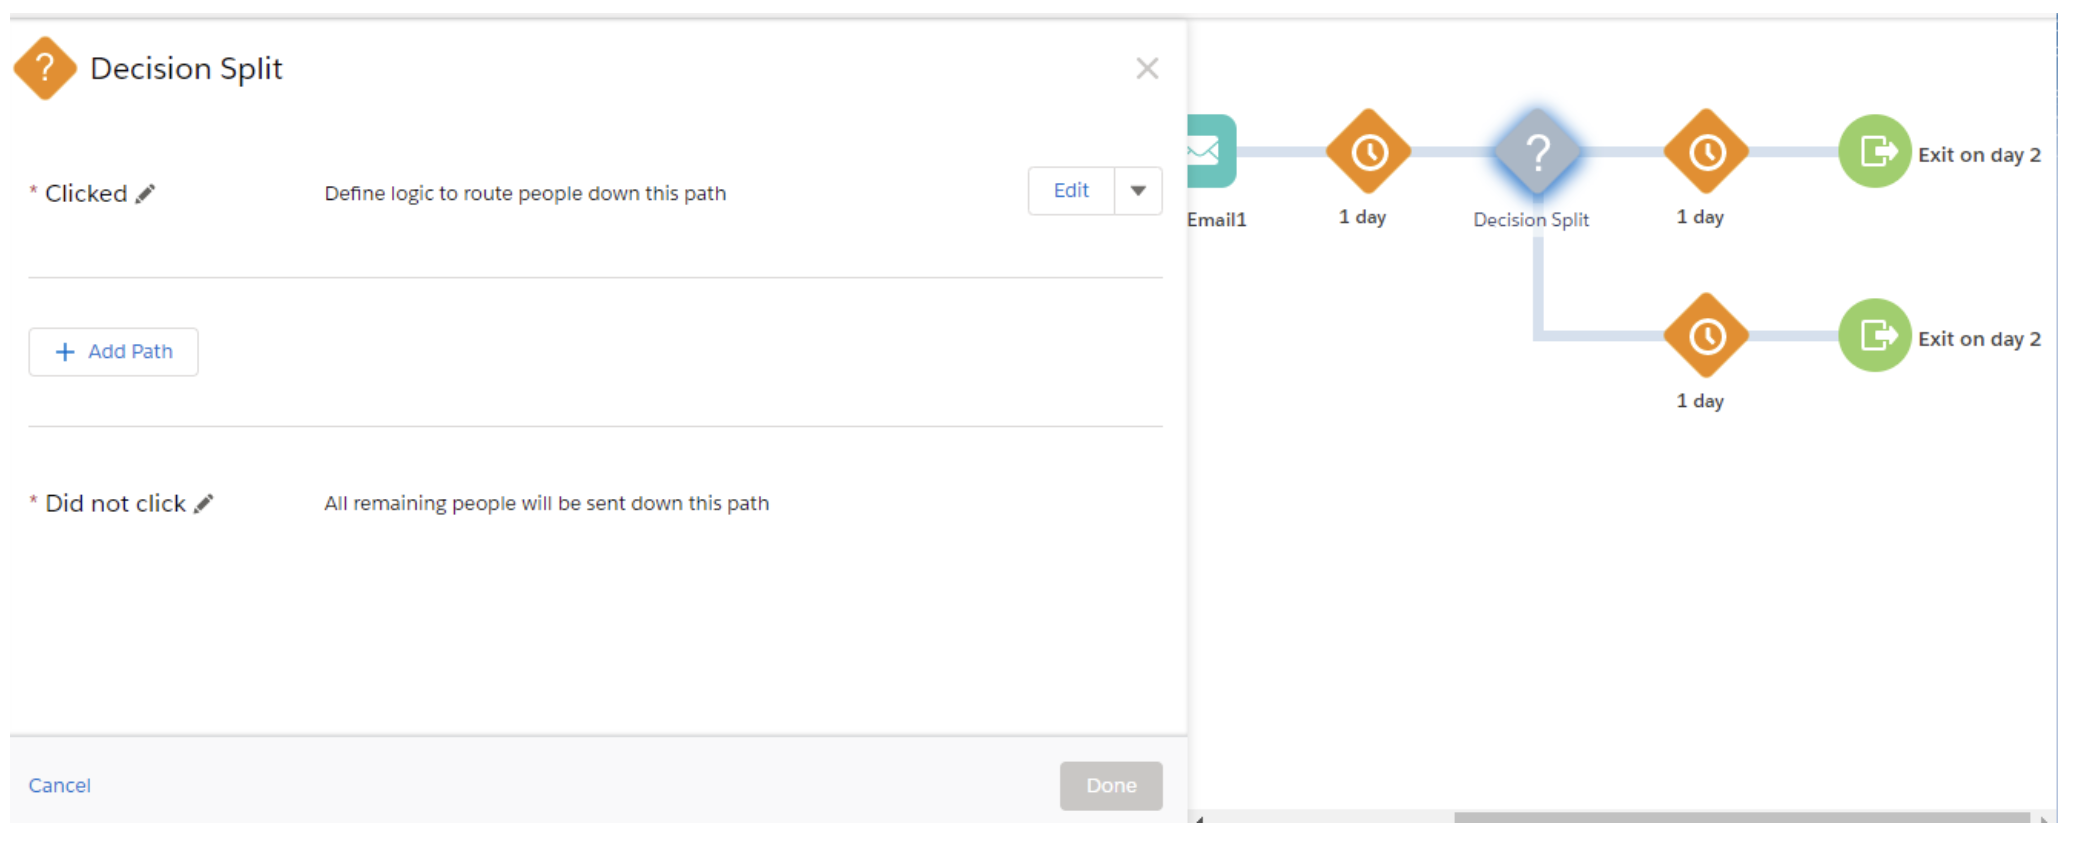
Now that the data extension is created, and the automation is scheduled and running, let’s move on to our Journey. Instead of creating an Engagement Split, we are going to use a Decision Split.
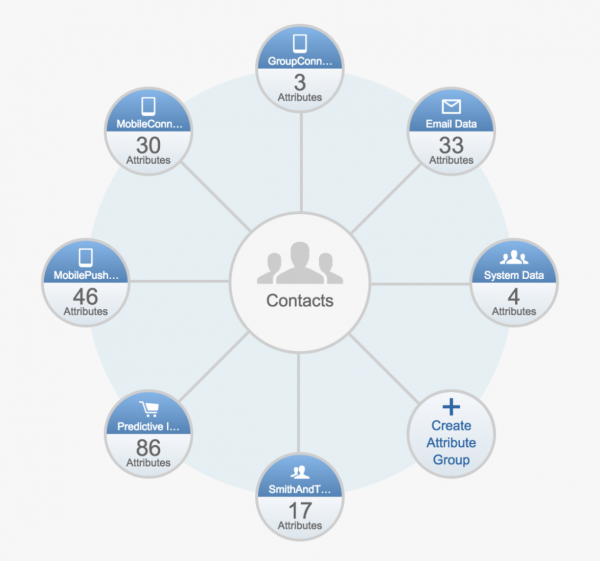
Using Contact Data, we need to drag and drop the LinkName field from our linked data extension and add a filter on our Alias value defined previously on our email links.
Contacts Data > YourMainDE > ClicksDE > LinkName = cmp1_email1_cta1
And that’s it, your journey can now track clicks on dynamic links. Please note that a lot of combinations are possible using this solution and I’ve tried to keep it as short as possible by showing you the idea behind it and leaving it to your use case/imagination to adapt it.
For example, you can combine an Engagement Split (to track static links) with a Decision Split (for dynamic links). You can also filter on EventDate if the journey re-entry settings are set on re-entry after exit or re-entry at any time…